

Happy Thursday Morning Everyone! It's sunny and warm here in Southern Louisiana. School is almost out for Summer! I have had several requests on how I made the Tissue Box Card I posted on Monday. Here are step by step instructions so you can create your own. Enjoy!
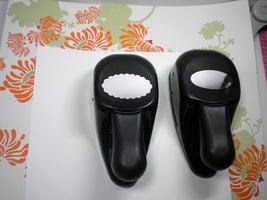
You will need: 1 sheet of 8 1/2 x 11 Sheet of Whisper White Cardstock, 1 sheet of 12 x 12 Designer Series Paper, a small piece of color coordinated cardstock, Stampin' Up Large Oval Punch, Stampin' Up Scallop Oval Punch
1. Cut your 8 1/2 x 11 Sheet of Whisper White Cardstock 4 1/4 x 11. This will give you two pieces to make two tissue box cards.

2. Score one piece of 4 1/4 x 11 Whisper White Cardstock at 1/2", 3", 4", and 6 1/2".

3. Cut the 12 x 12 sheet of Designer Series Paper at 4 x 12.
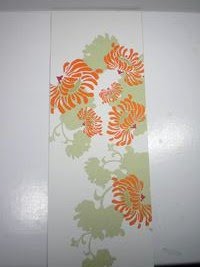
4. Next cut the 4 x 12 Designer Series Paper into 2 pieces at 4" x 4 1/4", 1 piece at 4"x 2 1/4", and 1 piece at 4" x 3/8".

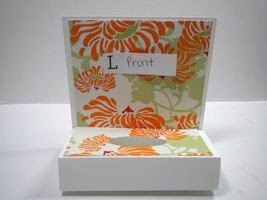
5. Use adhesive to attach the 4" x 4 1/4" pieces of Designer Series Paper to the front and back of the 6 1/2" section of the Whisper White Cardstock.

6. Use adhesive to attach the 4" x 2 1/4" piece of Designer Series Paper to the 3" section on the back of the Whisper White Cardstock. Then punch it with the Stampin' Up Large Oval Punch.

7. Add a piece of Tacky Tape to the 1/2" section of the Whisper White Cardstock.

8. Attach this section to the front of the 6 1/2" piece of cardstock which is covered with Designer Series Paper.
9. Use the Stampin' Up Large Oval Punch to punch an oval in a piece of coordinating cardstock.

10. Take the Stampin' Up Scallop Oval Punch and punch around the oval shape.

11. You will have a scallop oval with the inside punched out.

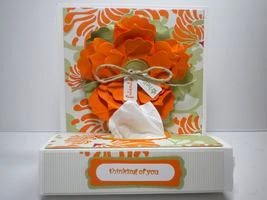
12. Use adhesive to attach the scallop oval around the tissue box opening.

13. Use adhesive to attach the 4" x 3/8 " piece of Designer Series Paper to the 1/2" section of the tissue box card and add a purse size tissue pack.

14. Decorate your tissue box card anyway you like!

Lisa, Your project is so pretty! I love the new DSP! Thanks for sharing the wonderful tutorial with us! You rock! :)
ReplyDeleteYou are very welcome Cherie! I like that you can change this project by the season using different DSP. If you make one, please send me a picture so I can see it!
ReplyDeleteVery neat idea. Thanks.
ReplyDeletei am for the first time here. I found this board and I in finding It truly helpful & it helped me out a lot. I hope to present something back and help others such as you helped me. tissue paper machine
ReplyDelete