

Good Morning Everyone! Are you in the Christmas Spirit yet? I am! As promised, here is the tutorial to create your own Designer Series Paper Gift Bags. Have fun coming up with different designs and color combinations. Enjoy!
1. You will need: 10 x 13 catalog mailing envelopes available from your local office supply store or big box store, a bone folder, Tacky Tape, a paper trimmer with a scoring blade, stamps, ribbon, and other embellishments to decorate, and the Stampin' Up Word Window punch.

2. Cut 3 inches off the top of the catalog mailing envelope with your paper trimmer.

3. Using the scoring blade on the trimmer, score 2 inch lines on the left, right, and bottom edges of the catalog mailing envelope.

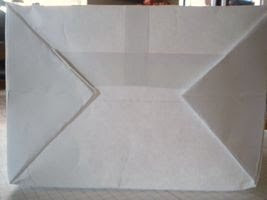
4. Gently open the catalog mailing envelope and start to shape your gift bag by folding all the score lines. Use the bone folder to make your lines nice and crisp.

5. Attach Tacky Tape to each of the bag's flaps.

6. Fold flaps down to make the bottom of your gift bag.
7. Use the Stampin' Up Word Window Punch to make a slot for ribbon to close your bag.

8. You now have your gift bag to decorate and embellish how you wish!


These are so pretty!
ReplyDeleteAmazing!Its so gorgeous,I like it so much.
ReplyDeletegift pakistan