Quick & Easy DIY Easter Basket Favors with Stampin’ Up!


Hello Crafty Friends! Today’s share features these adorable Easter Basket Favors created with the Stampin’ Up! Easter Basket Stamp Set and Easter Basket Dies! I used the Easter Joy 12” x 12” Specialty Designer Series Paper for the basket die cuts, then wove in spring-colored cardstock for a sweet handmade touch. Each basket is finished with a paper bow, embellished with the Easter Assortment Pack, and filled with chocolate eggs and Easter grass.


These quick and easy DIY Easter favors are perfect for Easter gifts, spring parties, classroom treats, or even summer celebrations. Simple to create and absolutely charming for any occasion! 


Shop Here: https://lisaflemming.stampinup.net/


Easter Basket Box Measurements:

Crumb Cake Box Base: 4 1/2” x 3 3/4” (Score at 1 1/4” on all 4 sides)


Paper: Azure Afternoon, Crumb Cake, Daffodil Delight, Pretty In Pink, Easter Joy 12” x 12” Specialty Designer Series Paper


Accessories: Easter Basket Dies, Stampin’ Cut & Emboss Machine, Easter Assortment Pack. Chocolate Easter Eggs, Easter Grass


Happy Stamping!


Painted Illusions Spring Thank You Card - February Product of the Month


Hello Crafty Friends! 🌸 Today’s Share is a Spring Thank You Card created with the beautiful Painted Illusions 12” x 12” Designer Series Paper, the February 2026 Product of the Month! I paired it with the Easter Time Mix & Match Ephemera Pack and Stylish Shapes Dies for a layered focal point, then stamped my sentiment using the Fabulous Sayings Stamp Set (January 2026 Product of the Month).


To finish it off, I added texture with the Baker’s Twine Essential Pack and a pop of color using the 2025–2027 In Color Flat Pearls. Using a simple card template made this project quick and easy—perfect for spring card making! 🌷


✨ Don’t forget — the Painted Illusions Designer Series Paper is Available While Supplies Last!


🛍 Shop Now: lisaflemming.stampinup.net.


Happy Stamping!


Fantastic Friday - Dainty Delight Mother’s Day Criss Cross Card


Good Morning Everyone! My Fantastic Friday Share is a Mother’s Day Criss Cross Card created with the Stampin' Up! Dainty Delight dies and New Nested Essentials dies. I used strips of Basic White card stock to form the the Trellis. Then, I embellished Daffodil Delight ribbon, and Pearl Basic Jewels. Not only is this technique Quick and Easy, but also it can be adapted for other occasions as well. I wish each of you a Wonderful and Happy Mother's Day!


Here Are The Details:

I used Painters Tape to hold down the Basic White Trellis Strips to the card base. I then adhered them together with Multi-Purpose Glue. Next, I die cut each of the flowers in multiple colors and attached them to the vine.


Card Measurements:

Basic White Card Base: 5 1/2” x 8 1/2” (2 Pieces)
Basic White Criss Cross Layers: 1/2” x 5” (6 Pieces)
Inside Melon Mambo Card Layer: 5 1/4” x 4” 
Inside Basic White Card Layer: 5” x 3 3/4”

Paper: Basic White, Daffodil Delight, Garden Green, Melon Mambo, Pumpkin Pie 

Ink: Melon Mambo 

Stamp: Daffodil Daydream (Retired Outside Sentiment), Strong & Beautiful (Retired Inside Sentiment)

Accessories: Dainty Delight Dies, Designer Tags Dies, Nested Essentials Dies, Stampin’ Cut And Emboss Machine, Daffodil Delight 1/4” Ribbon, Pearl Basic Jewels 

Happy Stamping!

Fantastic Friday - Rejoice In Him Easter Cross Card (Happy Easter!)


Good Morning Everyone! My Fantastic Friday Share is an Easter Cross Card created with the Stampin' Up! Rejoice In Him and Framed Florets stamp sets and coordinating Framed Florets dies. Cased from Beverlee Morales, I change the colors, altered some elements, and added flowers and a sentiment. I used the In Good Taste Designer Series Paper on the Cross. Then, I embellished with Highland Heather 1/2" Grosgrain Ribbon and Gold Adhesive-Backed Swirls. I wish Everyone a Safe and Happy Easter!

Here Are The Details:

I used the Stampin’ Up! Cane Weave 3D Embossing Folder on the background. Then, I created a focal point with the Beautiful Shapes dies and Vellum Cardstock. The flowers were colored with the Stampin’ Blends Alcohol Markers. 


Card Measurements:

Early Espresso Card Base: 4 1/4” x 11”
Early Espresso Card Layer: 5 1/4” x 4”

Cross
Early Espresso Cardstock: 1 1/2”  x 3 1/2” and 1 1/2” x 5”
In Good Taste Designer Series Paper: 1 1/2”  x 3 1/2” and 1 1/2” x 5”

Inside Basic White Card Layer: 5 1/4” x 4”

Paper: Basic White, Early Espresso, Vellum 

Ink: Highland Heather, Daffodil Delight Stampin’ Blends, Highland Heather Stampin’ Blends, Old Olive Stampin’ Blends

Stamp: Rejoice In Him, Framed Florets

Accessories: Beautiful Shapes Dies, Framed Florets Dies, Cane Weave 3D Embossing Folder, Stampin’ Cut And Emboss Machine, Gold Adhesive-Backed Swirls, Highland Heather 1/2” Grosgrain Ribbon 

Happy Stamping!

Make It Monday - Happiness Abounds Split Lattice Card


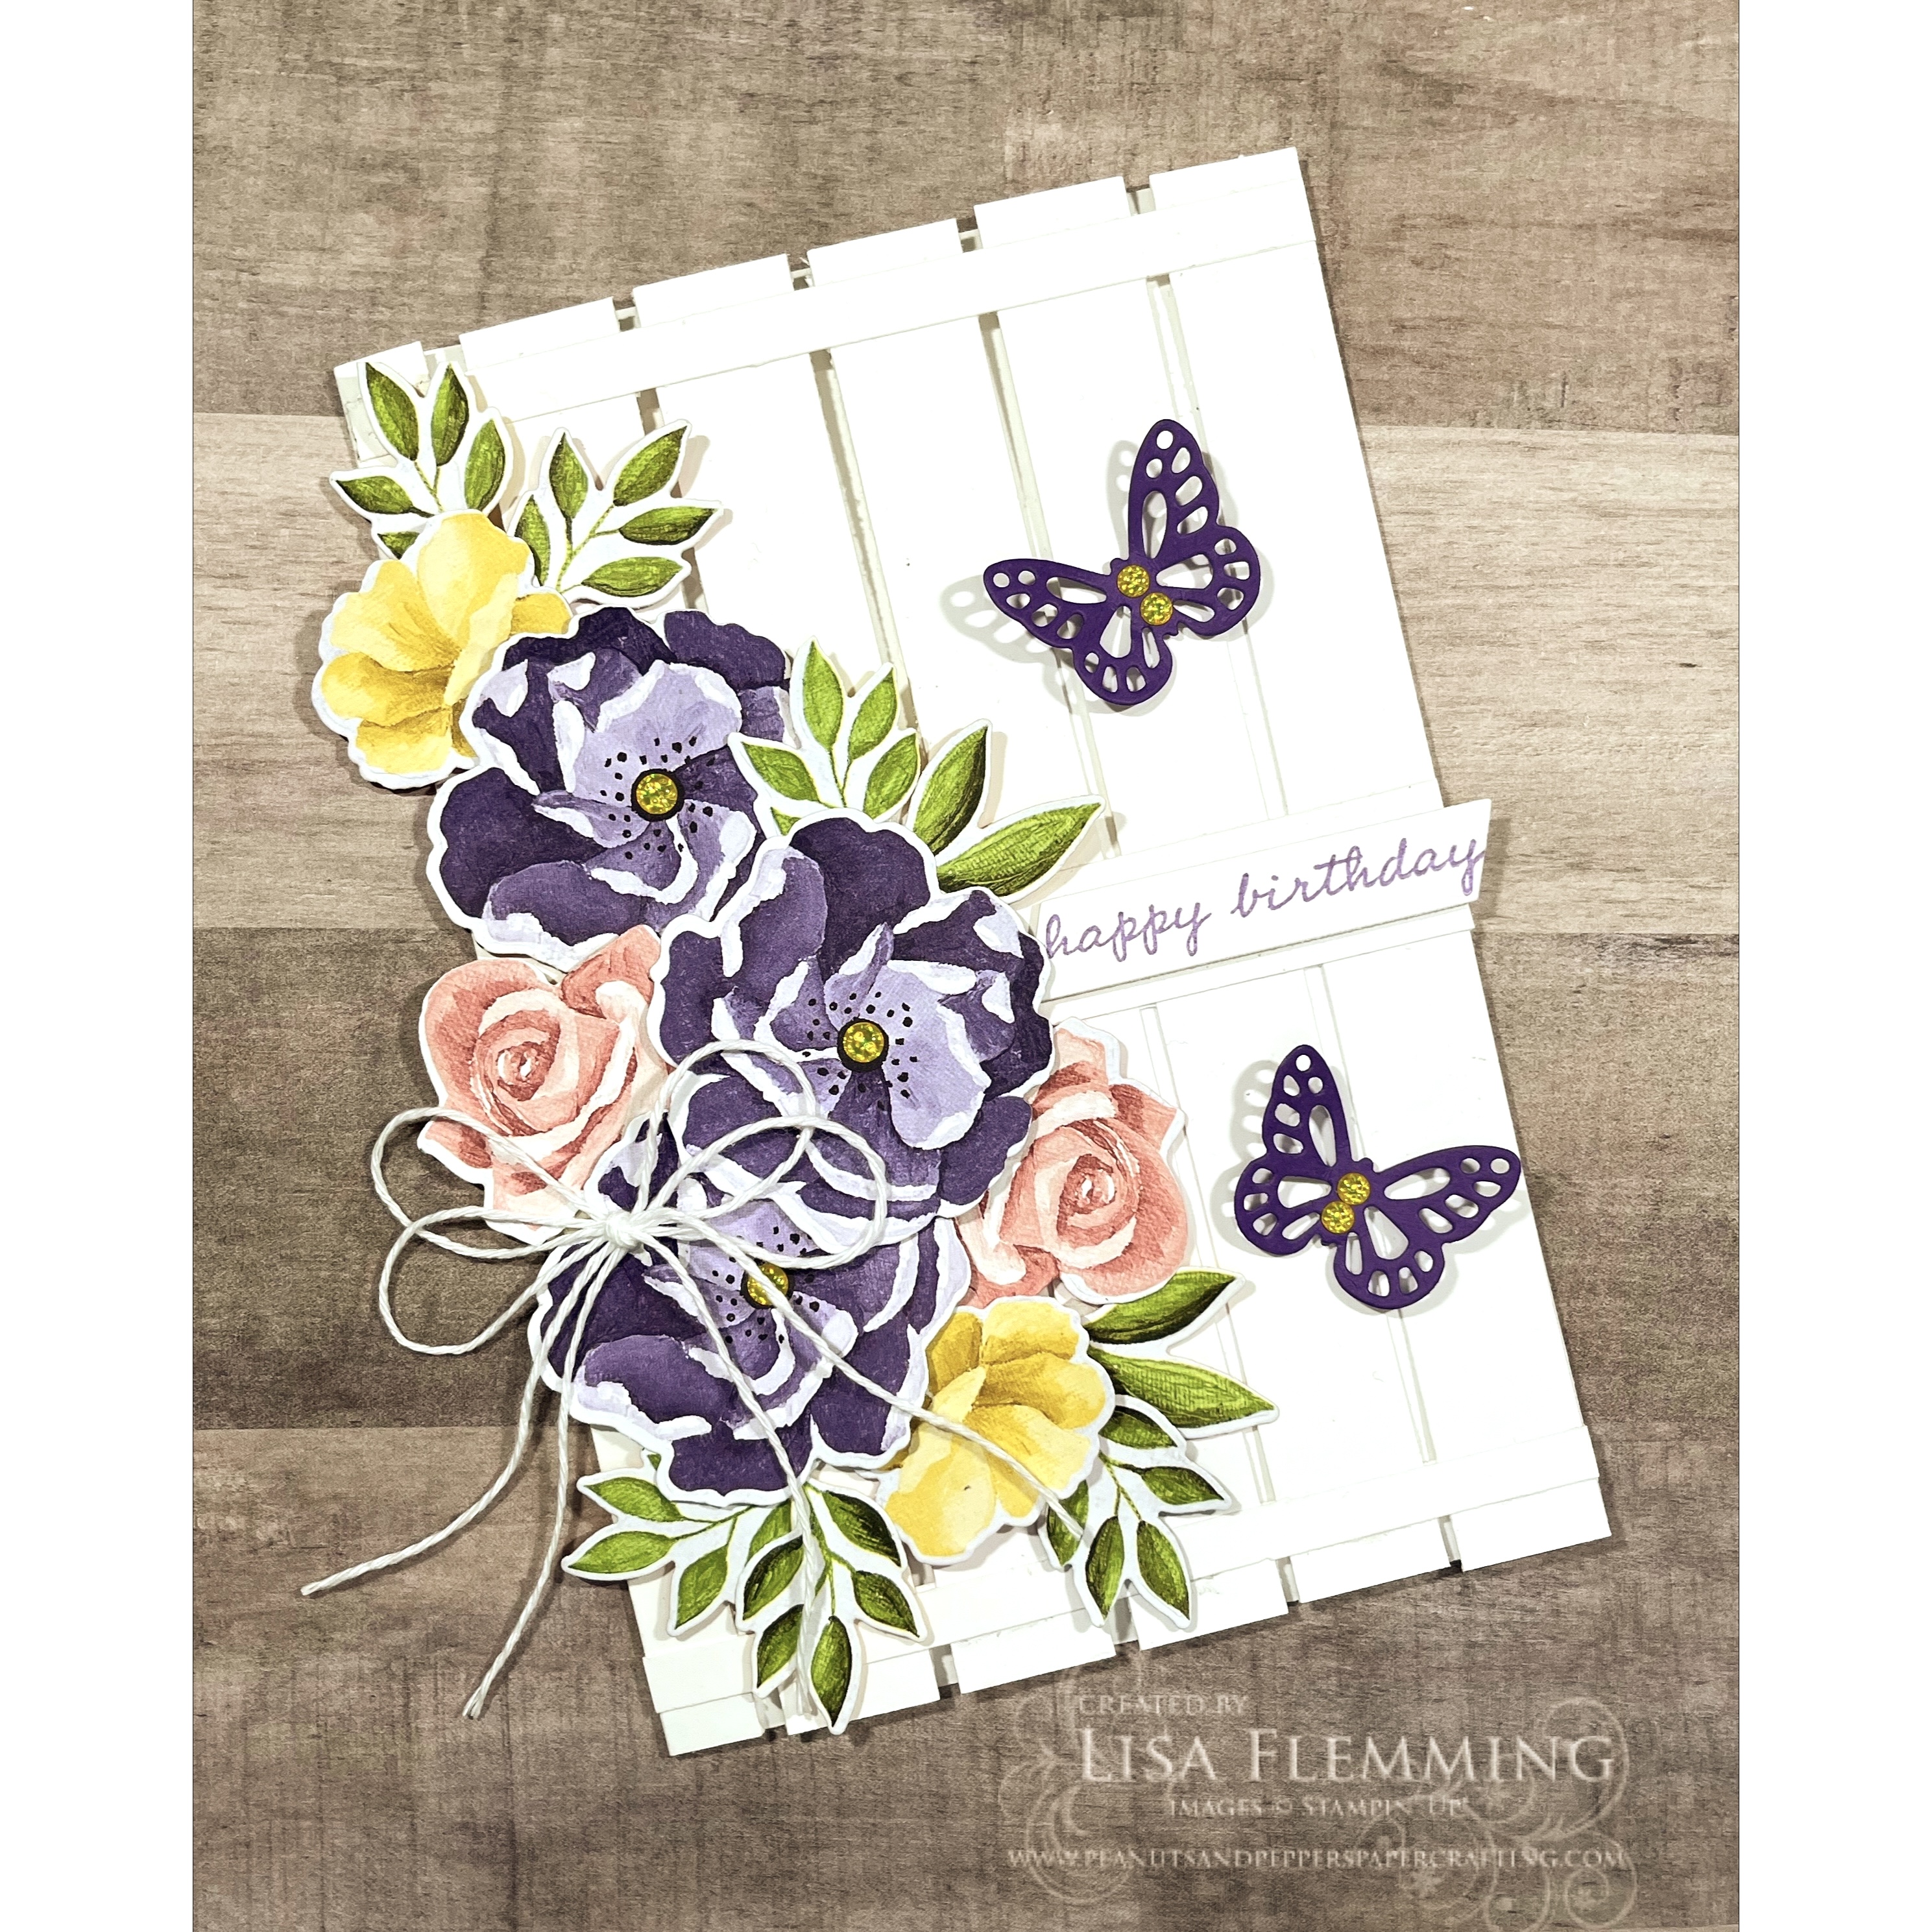
Good Morning Crafty Friends! My Make It Monday Share is a Birthday Split Lattice Card created with the Stamping Up! Happiness Abounds stamp set and coordinating Blooming Happiness dies. I used the Hues of Happiness 12” x 12” Designer Series Paper for the flowers and I embellished with Baker’s Twine and the Glossy Dots Assortment. I loved the Challenge of Creating a 5” x 7” Card and Trying the Lattice Technique, which was Easier than I thought!


Here Are The Details:

This is my 8th Submission For The Craft Roulette Card Challenge #155.

These are the parameters:


Project - 5” x 7” Card

Colors - Spring Colors (Daffodil Delight, Flirty Flamingo, Gorgeous Grape, Granny Apple Green)

Element - Starts With G (Garden Gate Lattice)

Random - Outside The Lines (Flowers Are Outside The Lattice Lines)


Card Measurements:

Basic White Card Base: 10” x 7” (Score at 5”. Then on one side Cut 3/4” Strips (5 in all). You will also need 2 Additional Strips 3/4” x 5” to stabilize the middle part of the Lattice. Next Cut Smaller Strips 1/4” x 5 (4 in all) for the Top and Bottom of the Lattice.)

Paper: Basic White, Gorgeous Grape, Hues Of Happiness 12” x 12” Designer Series Paper 

Ink: Highland Heather 

Stamp: Happiness Abounds 

Accessories: Blossoming Happiness Dies, Designer Tags Dies (Butterfly), Something Fancy Dies (Sentiment Label), Stampin’ Cut And Emboss Machine, Baker’s Twine Essential Pack, Glossy Dots Assortment 

Happy Stamping

Make It Monday - Flowering Rain Boots Seed Packet Card (It's A Card And A Gift!)


Good Morning Crafty Friends! I hope you had a great weekend! My Make It Monday Share is a Seed Packet Card created with the Stampin' Up! Flowering Rain Boots stamp set and coordinating Rain Boots dies. I used the Flowering Fields 12" x 12" Designer Series Paper on the background. Then, I created the Seed Packet pocket using the Many Layered Blossoms dies and a Clear Envelope. Next, I stamped and die cut the rain boots, flowers, and sentiment. Finally, embellished with Enamel Dots and Gorgeous Grape 3/8" Sheer Ribbon. I love how this is a Card and Gift as well!


Card Measurements:
Gorgeous Grape Card Base: 4 1/4" x 11"
So Saffron Card Layer: 5 1/4" x 4"
Flowering Fields 12" x 12" Designer Series Paper Layer: 5" x 3 3/4"
Inside Basic White Card Layer: 5 1/4" x 4"

Paper: Basic White, Gorgeous Grape, So Saffron, Flowering Fields 12" x 12" Designer Series Paper, Silver Foil Sheets

Ink: Pear Pizzazz, Poppy Parade, So Saffron

Stamp: Flowering Rain Boots

Accessories: Many Layered Blossoms Dies, Rain Boots Dies, Tasteful Labels Dies, Stampin' Cut and Emboss Machine, Classic Matte Dots, Gorgeous Grape 3/8" Sheer Ribbon, Clear Envelopes

Product List

Happy Stamping!


Make It Monday - Flowering Tulips Fun Fold Thinking of You Card


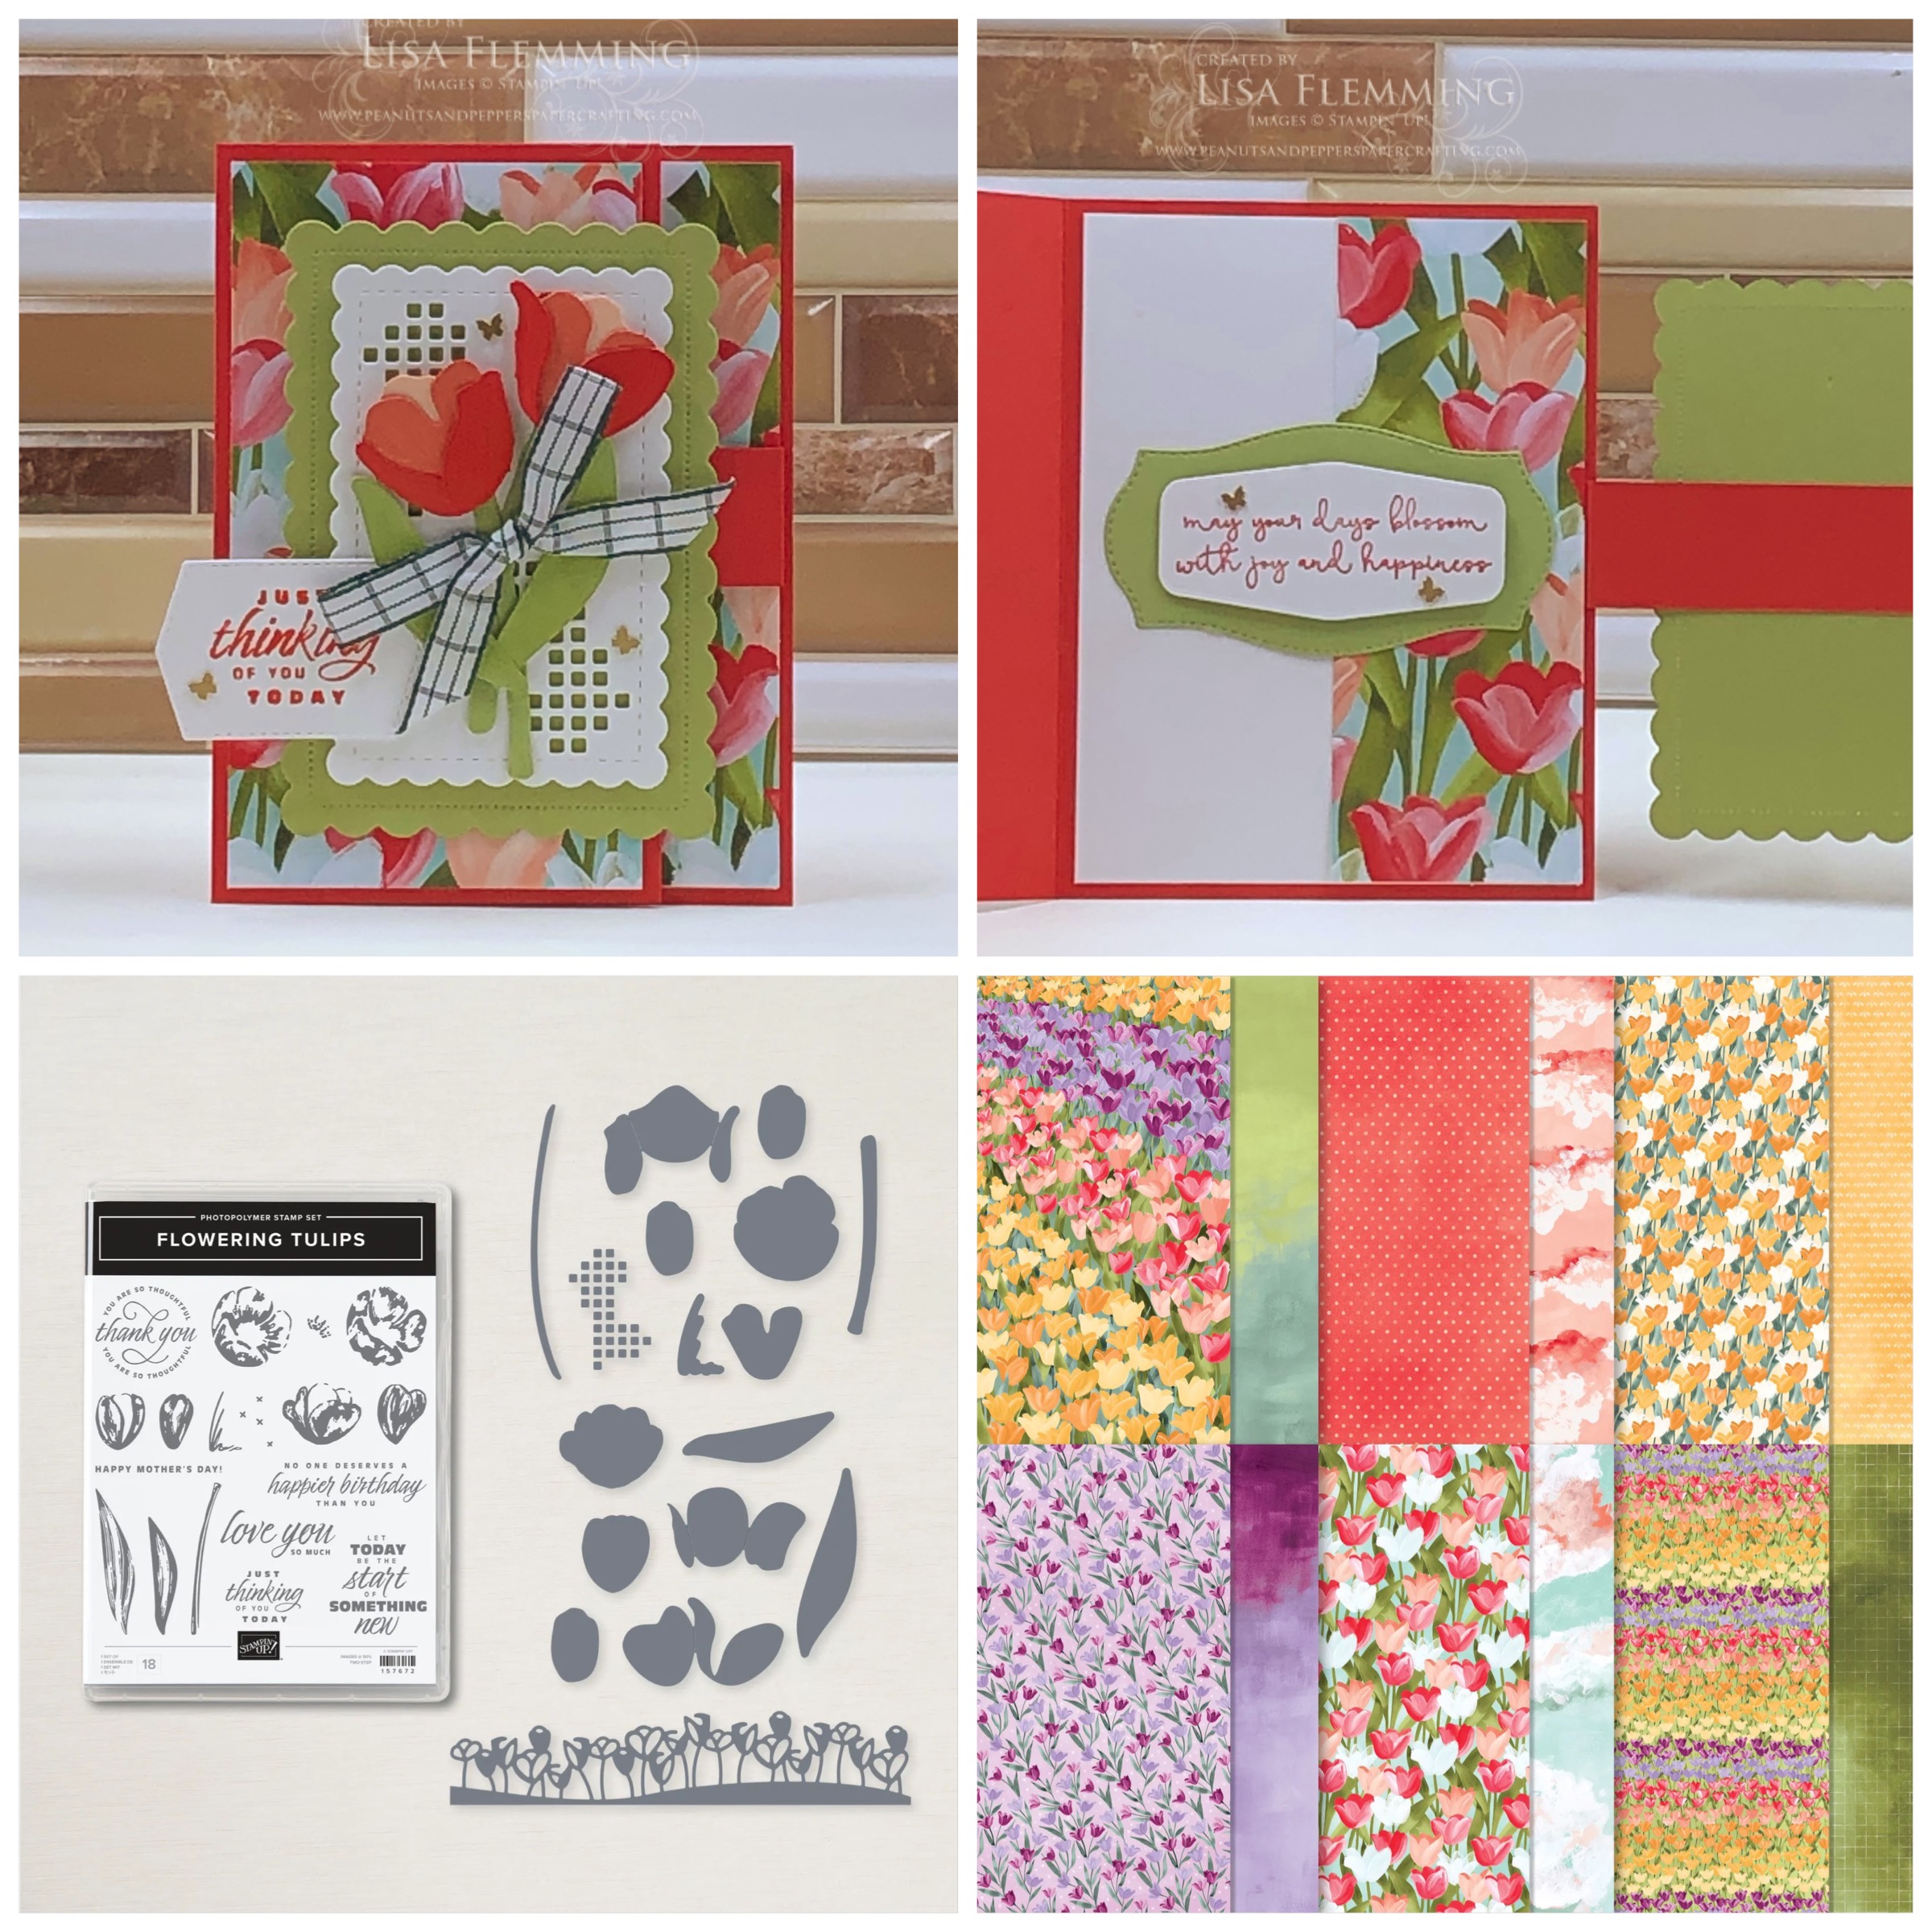
Good Morning Crafty Friends! I hope you had a great weekend! My Make It Monday Share is a Fun Fold Thinking of You Card created with the Stampin' Up! Flowering Tulips stamp set and coordinating Tulips dies. I used the Flowering Fields 12" x 12" Designer Series Paper on the background. Then, I created a focal point using the Scalloped Contours dies. Next, I die cut, assembled, and adhered the 3-D Tulips and Leaves. Finally, I added my sentiments and embellished with Brushed Brass Butterflies, and Evening Evergreen 3/8" Windowpane Check Ribbon. I love this time of the year!


Card Measurements:
Poppy Parade Card Base: 5 1/2" x 8 1/2" (Score at 4 1/4" then cut off on one side at 1" x 5 1/2". Save this piece for the Latch and score it at 2 3/4")

Flowering Fields Designer Series Paper Layers: 3" x 5 1/4" (1 piece front of the card)
                                                                             2" x 5 1/4" (1 piece inside of the card)

Basic White Inside Card Layer: 5 1/4" x 4"


Paper: Basic White, Calypso Coral, Pear Pizzazz, Petal Pink, Poppy Parade, Flowering Fields 12" x 12" Designer Series Paper

Ink: Pear Pizzazz, Poppy Parade

Stamp: Flowering Tulips, Easter Friends (Inside Sentiment)

Accessories: Scalloped Contours Dies, Tasteful Labels Dies, Tulip Dies, Stampin'  Cut & Emboss Machine, Brushed Brass Butterflies, Evening Evergreen 3/8" Windowpane Check Ribbon

Product List

Happy Stamping!


Related Posts with Thumbnails
Blogger Template Created by pipdig