

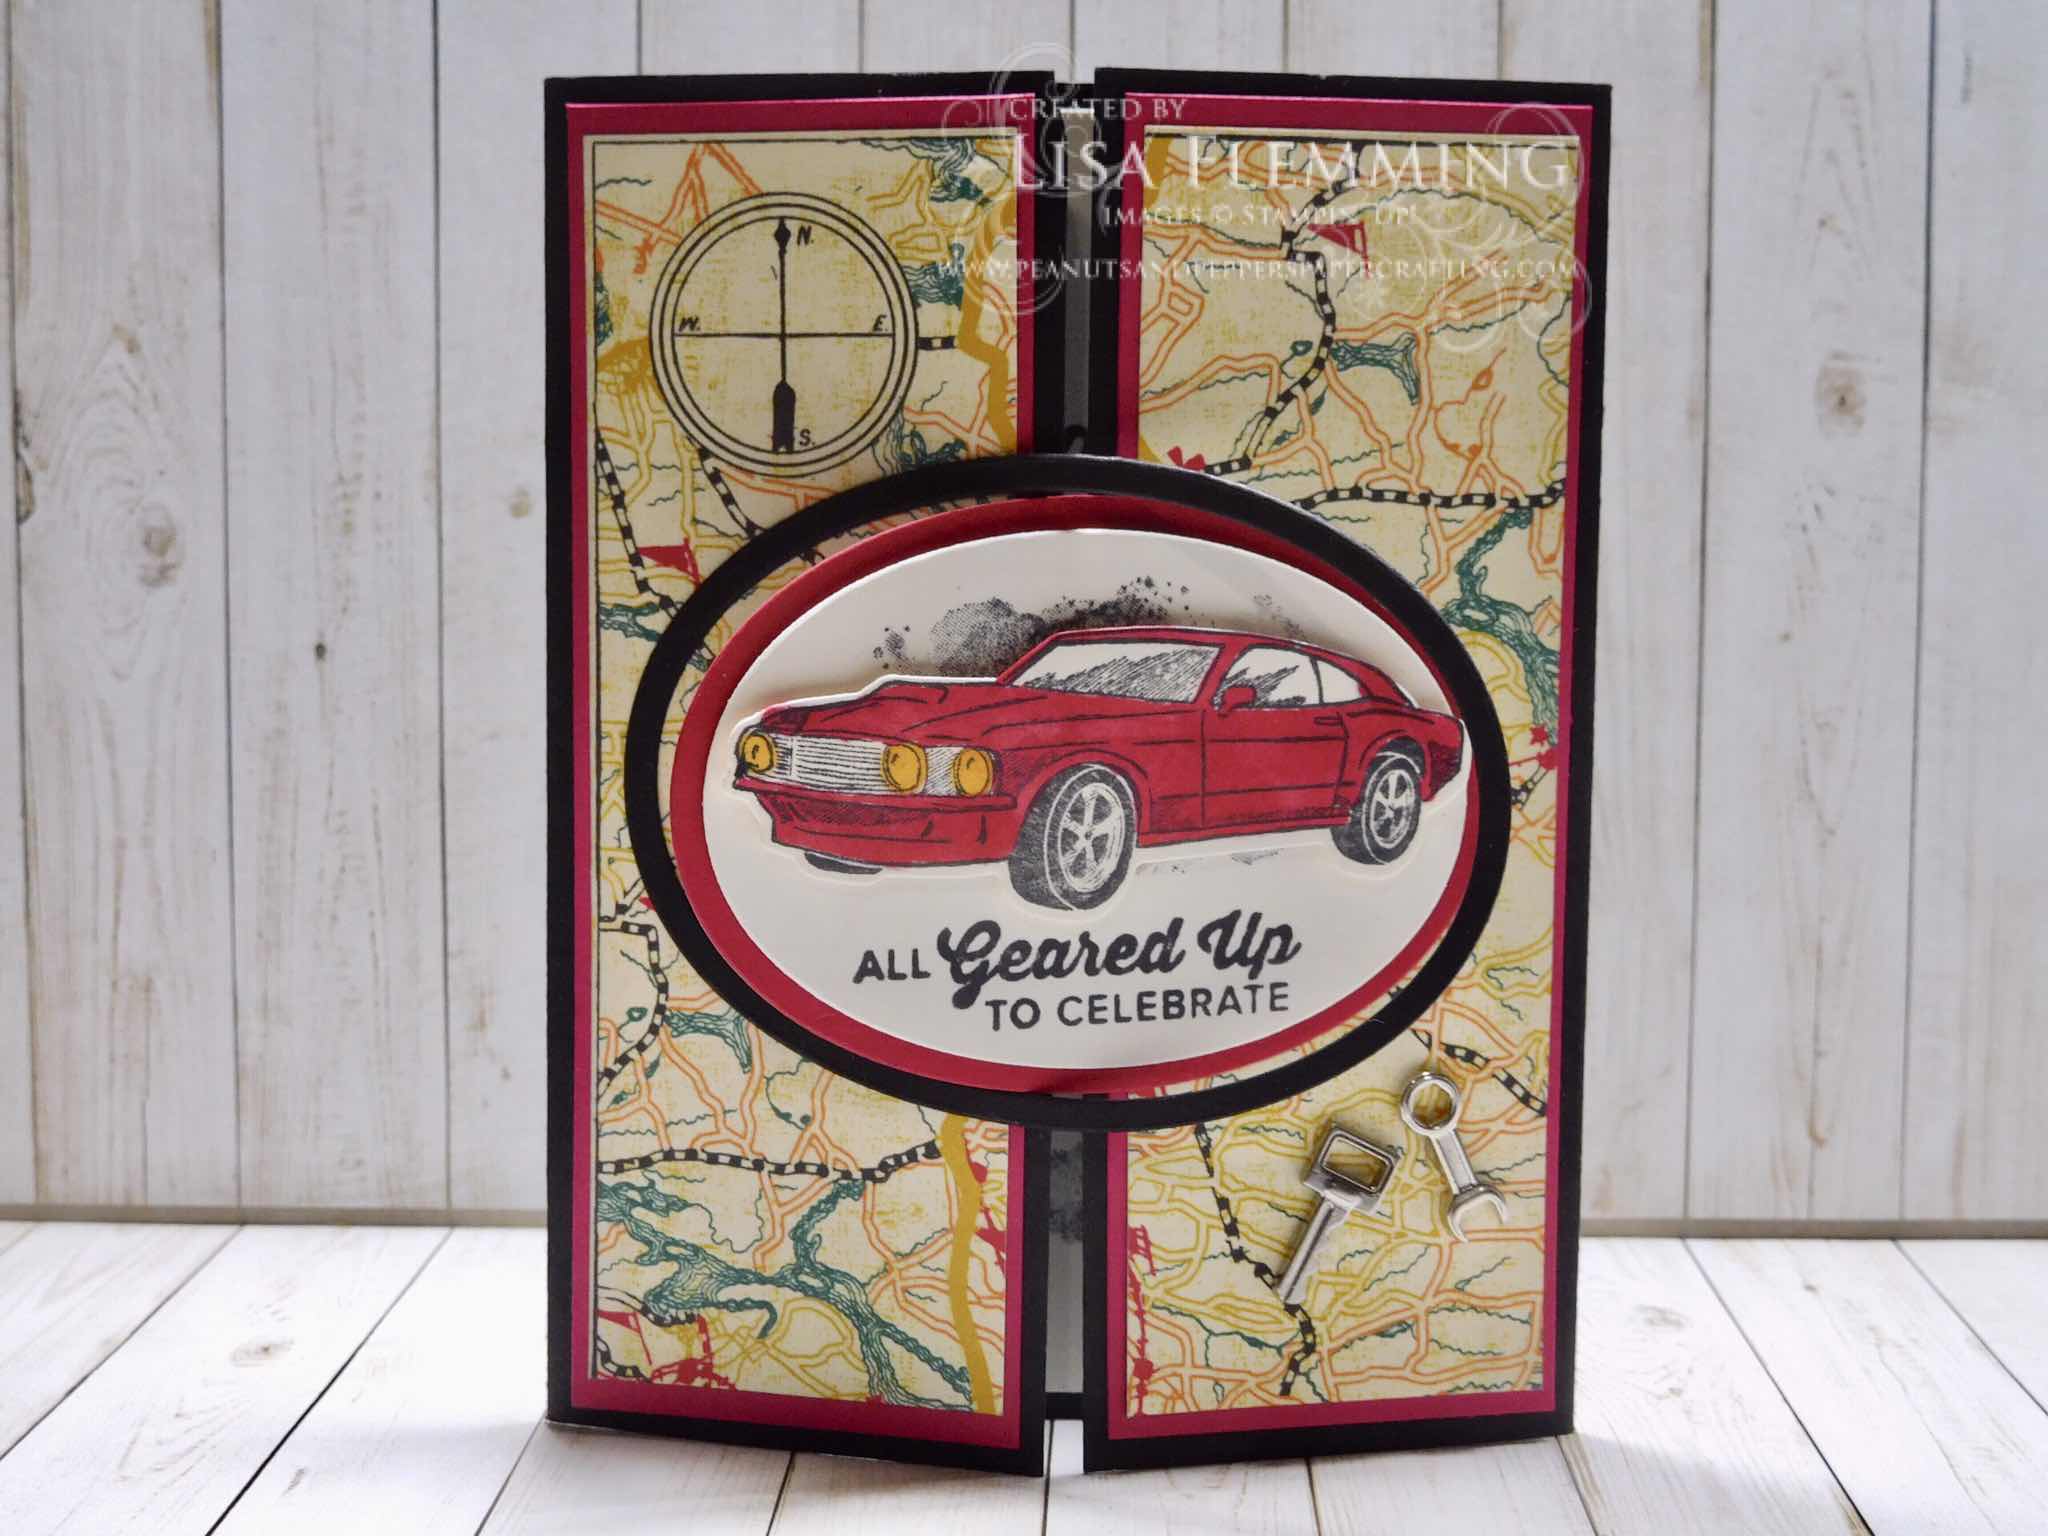
Good Morning Everyone! My Fantastic Friday Share is a Birthday Interlocking Gate Fold Card created with the Stampin' Up! Geared Up Garage stamp set and coordinating Garage Gears Thinlits Dies. I had been wanting to try this Card Fold for awhile, and this Bundle was perfect for it. I used the Classic Garage 6" x 6" Designer Series Paper on the background, then I used the Layering Ovals Framelits Dies to create the Interlocking Focal Point. After coloring the car image with the Stampin' Blends alcohol markers, I stamped my outside and inside sentiments. Finally, I embellished with the Classic Garage Metal Elements. I just love how everything came together! Look below for the FREE Tutorial!
Card Measurements:
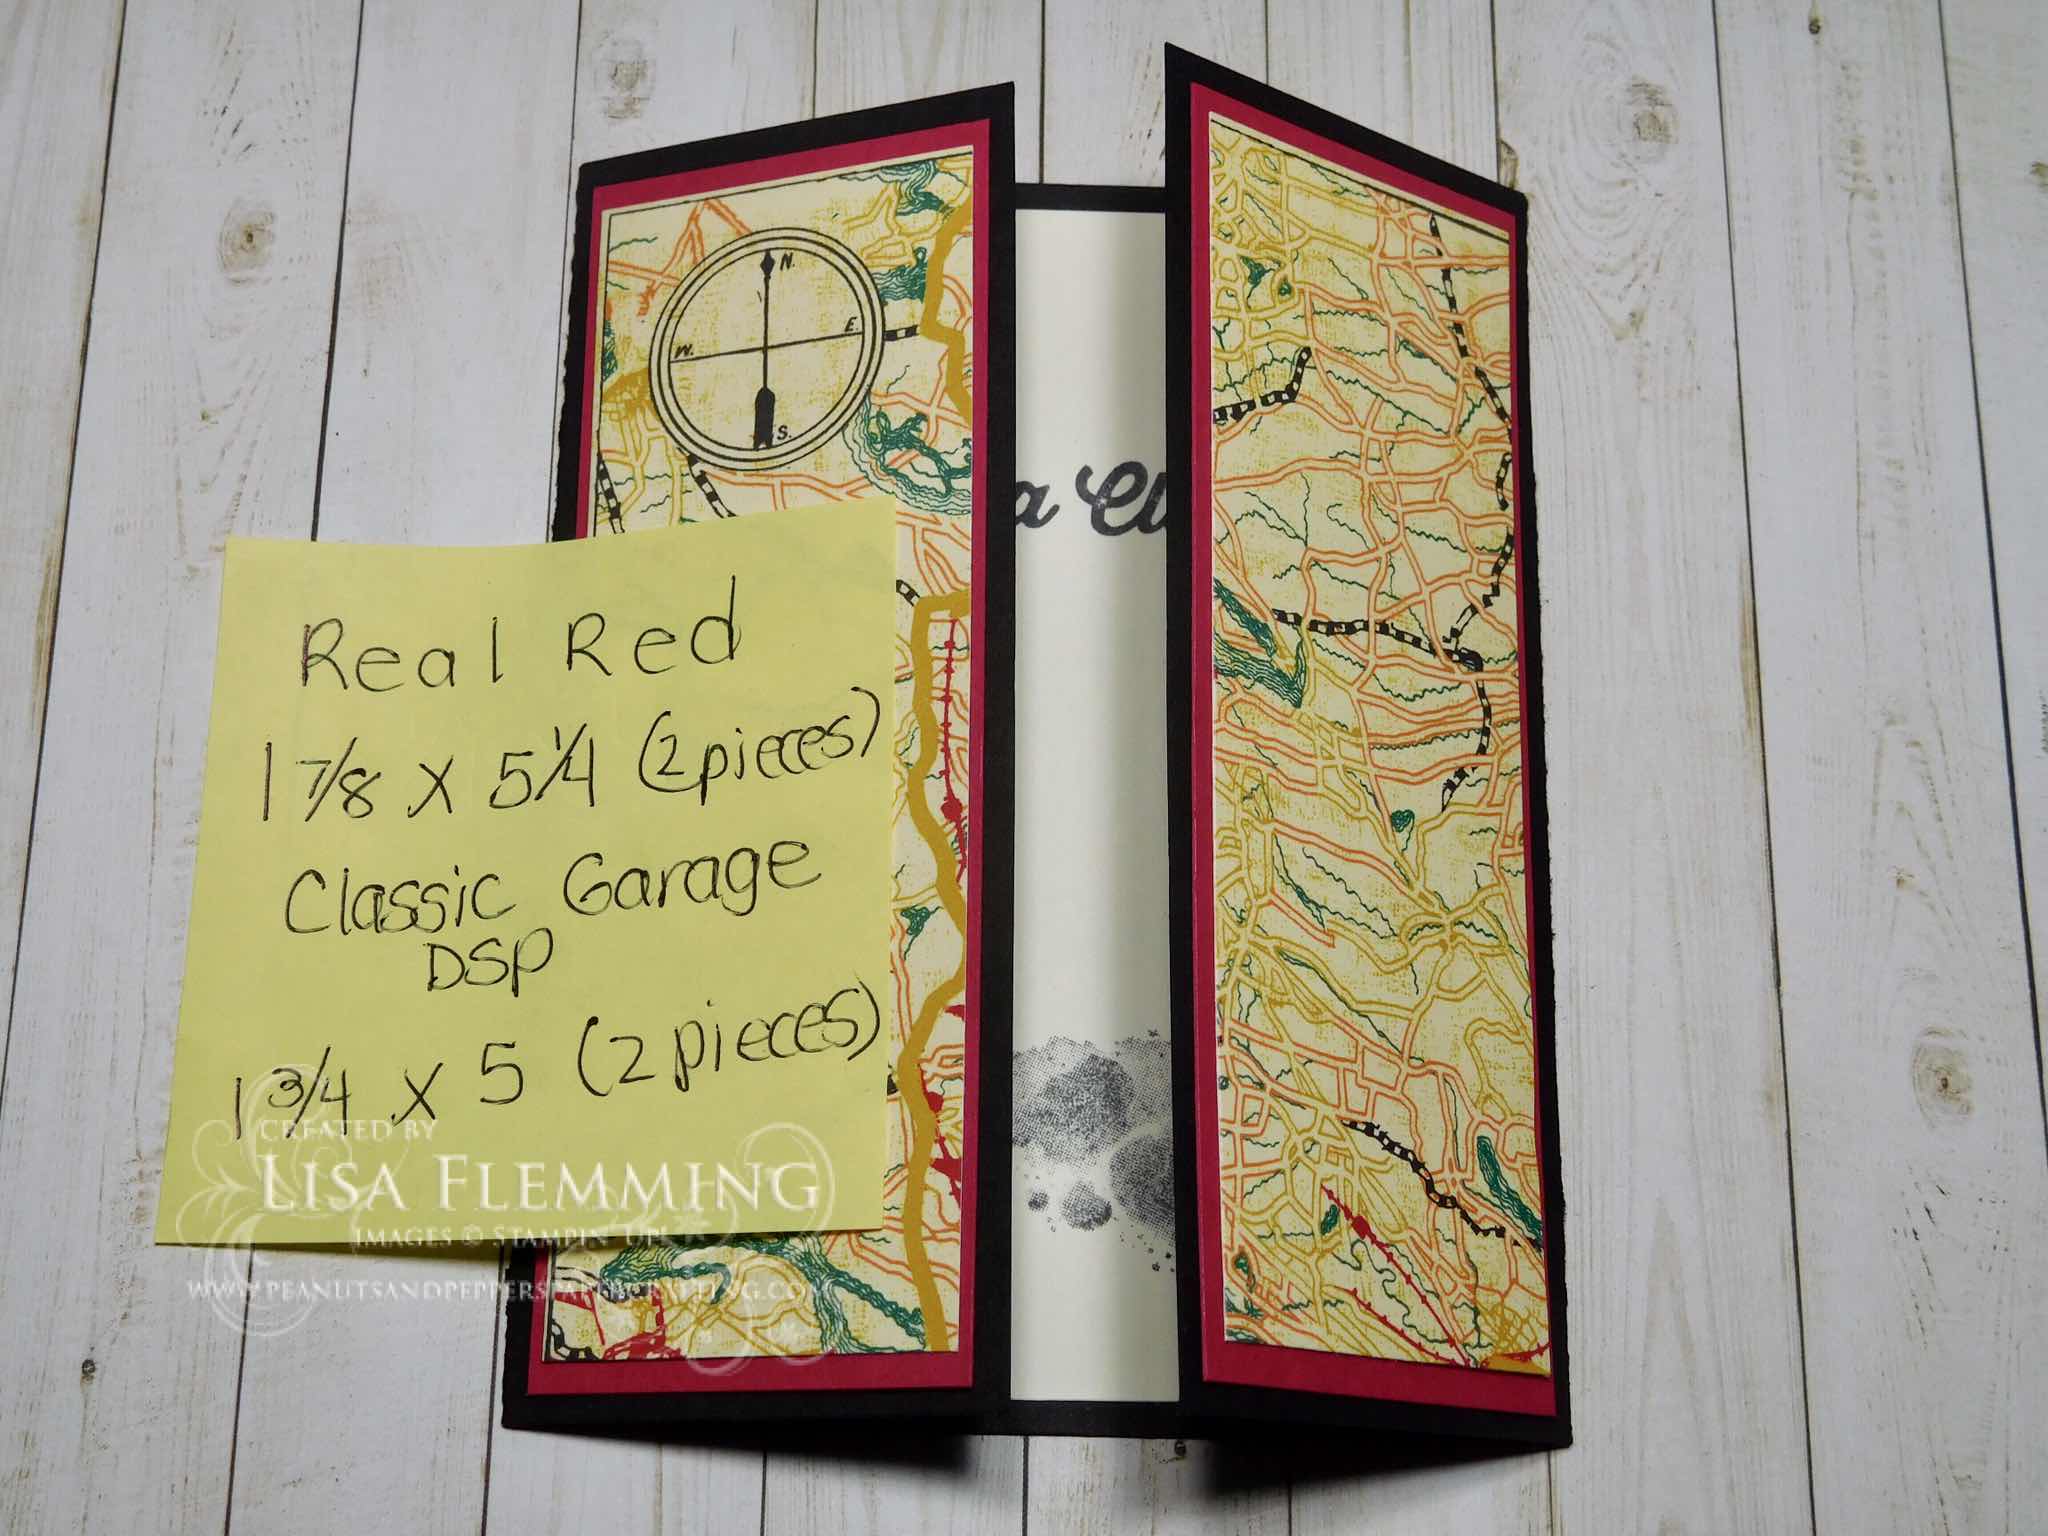
Basic Black Card Base: 5 1/2" x 8 1/2" (Score at 2 1/8" and 6 3/8")
Real Red Card Layers: 1 7/8" x 5 1/4" (2 pieces)
Classic Garage Designer Series Paper Layers: 1 3/4" x 5" (2 pieces)
Inside Very Vanilla Card Layer: 5 1/4" x 4"
Paper: Basic Black, Real Red, Very Vanilla, Classic Garage 6" x 6" Designer Series Paper
Ink: Black Memento, Real Red Dark Stampin' Blends, Mango Melody Light Stampin' Blends
Stamp: Geared Up Garage
Accessories: Garage Gears Thinlits Dies, Layering Ovals Framelits Dies, Big Shot, Classic Garage Metal Elements
Product List


 Designer Series Paper")


Geared Up Garage Interlocking Card Tutorial
1. Cut Basic Black Card Stock 5 1/2”x 8 1/2”.
(Score at 2 1/8” and 6 3/8”)

2. Stamp and adhere Very Vanilla Card Stock
5 1/4” x 4”.

3. Cut and Adhere Real Red Card Stock Layers
1 7/8" x 5 1/4" (2 pieces), then Classic Garage Designer Series Paper Layers 1 3/4" x 5" (2 pieces).
4. Use the Layering Ovals Framelits Dies to make the Interlocking Focal Point, by layering a larger oval over a smaller oval and running through the Big Shot Machine. This will leave an oval frame. Use the same Layering Oval Framelits for the Classic Car Focal Point.

5. Line the Oval Frame around the Oval Focal Point. Then, flip the Frame on the back. Put Tick Marks on the top and bottom of the Frame, right before the center point.
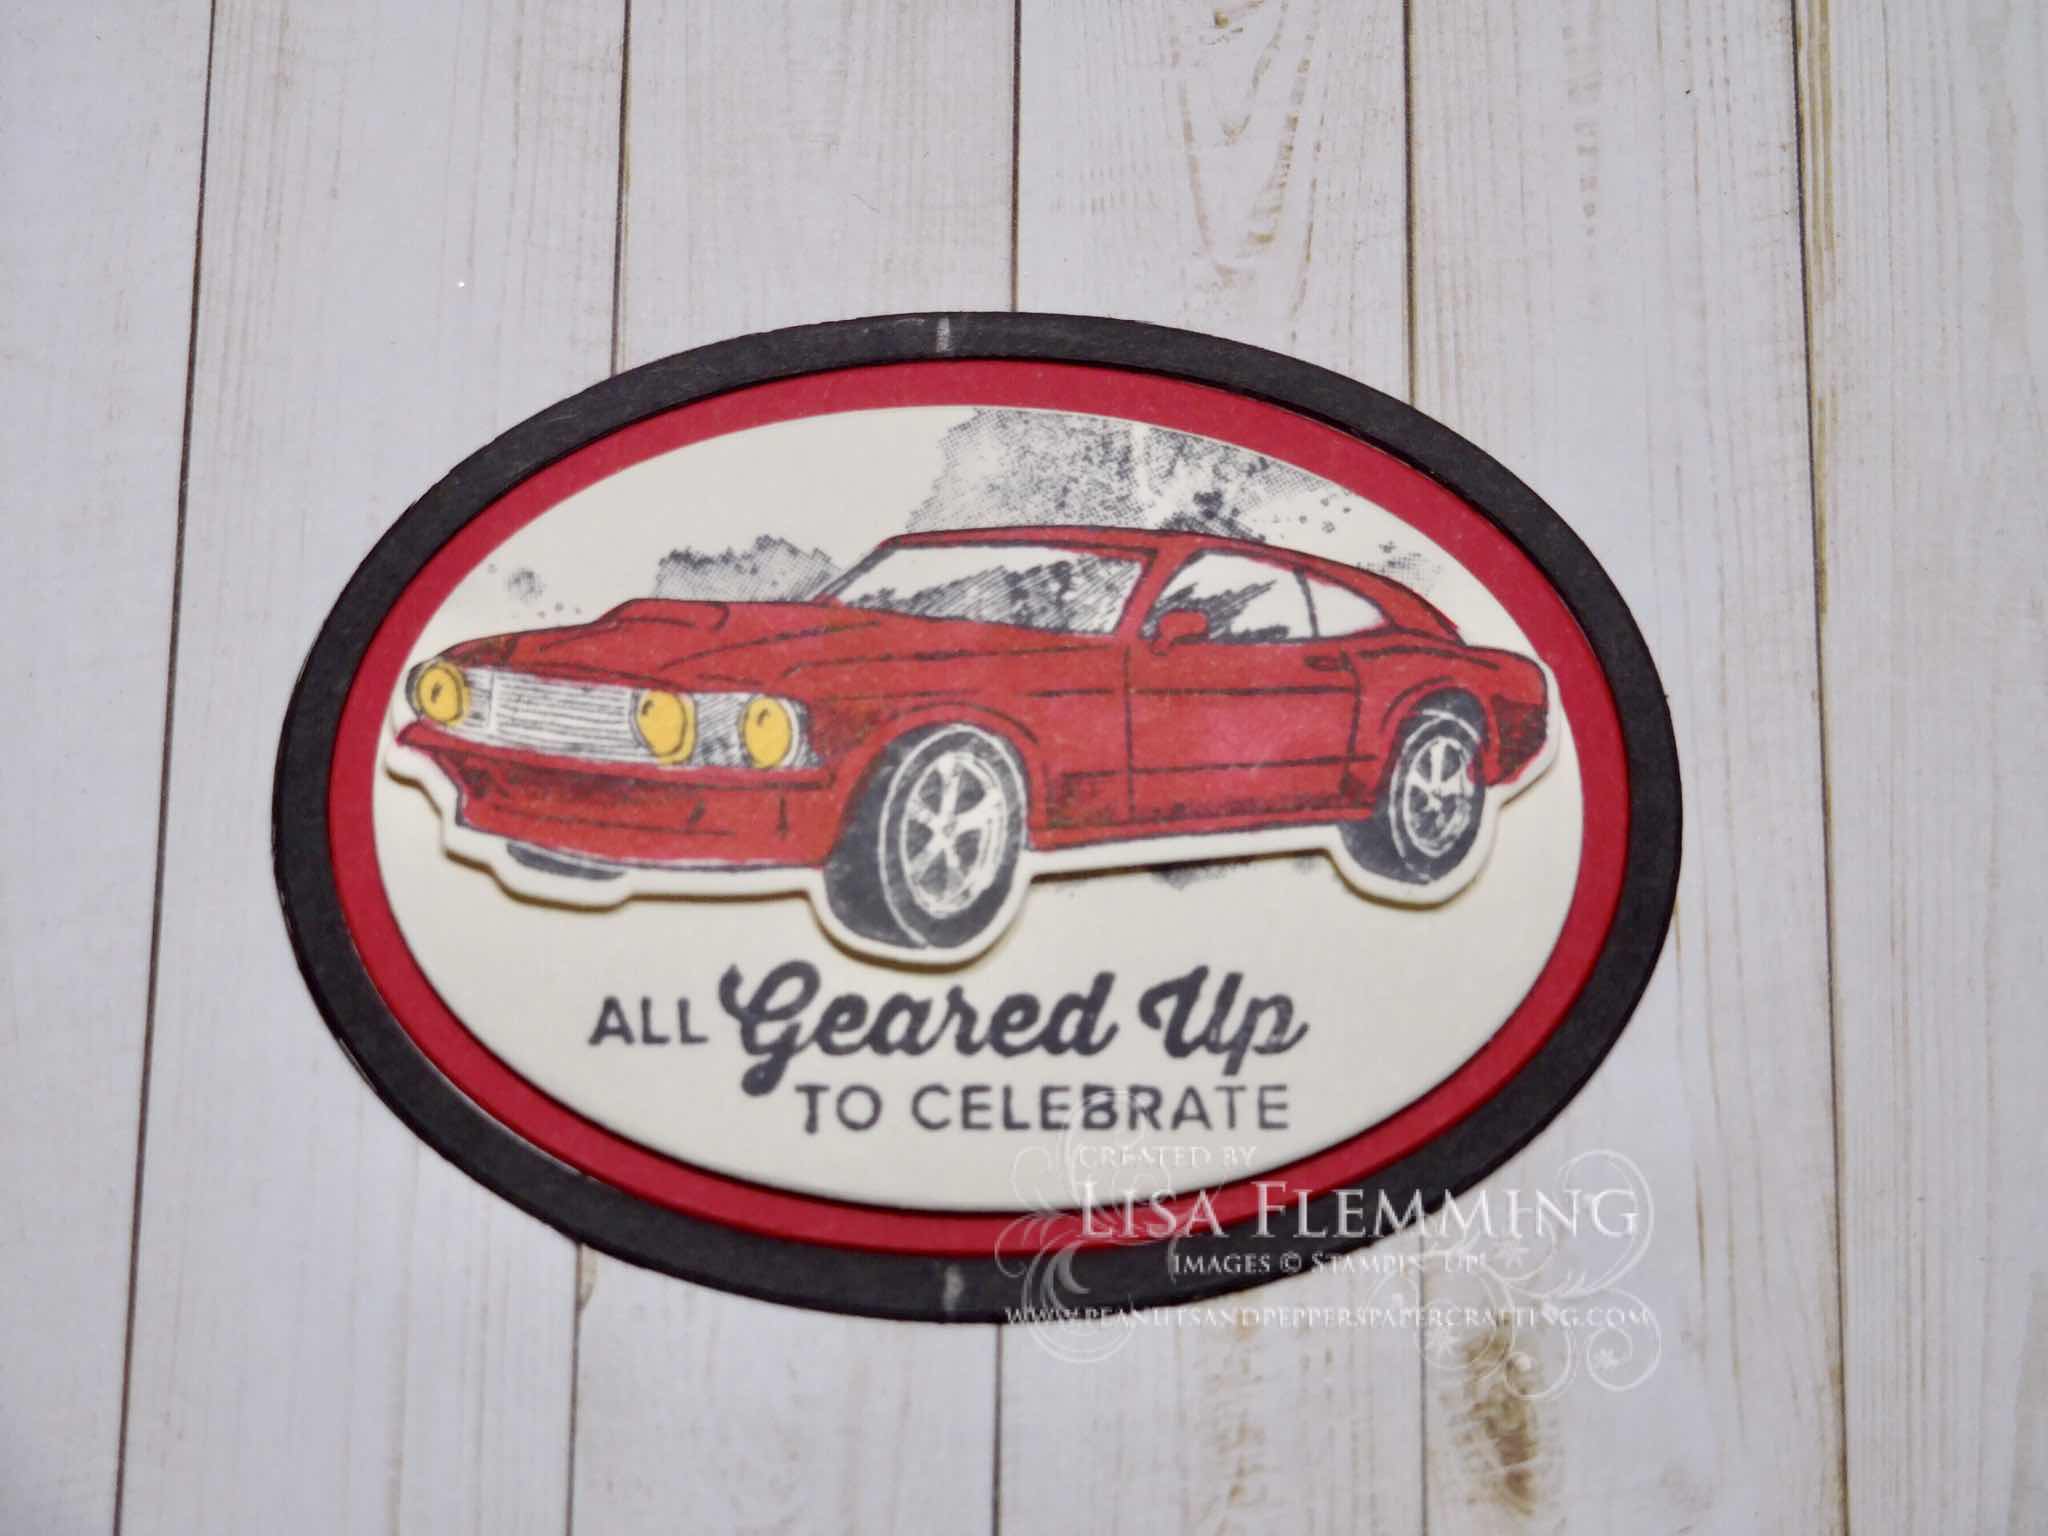
6. Now put adhesive Only on the right side of the Oval Focal Point and center it on the Card.

7. Finally, flip the Oval Frame back over and put adhesive Only on the left side, up to the Tick Marks, and center it around the Oval Focal Point. Use Mini Glue Dots to add the Classic Garage Metal Elements.

8. You now have an Interlocking Gate Fold Card.

Happy Stamping!


No comments
Post a Comment
Thank you for your kind words!