

Happy Mardi Gras Everyone! My Tuesday Tip is a Picture Tutorial on using Stampin' Up! Window Sheets and Foam Adhesive Strips to make the Barn Door slide easily. I learned this technique from Linda Heller and it does not require any washers, pennies, or buttons which tend to weigh a card down. Plus, I get to use products already in my stash!
Happy Stamping!

Barn Door Window Sheet Sliders Tutorial
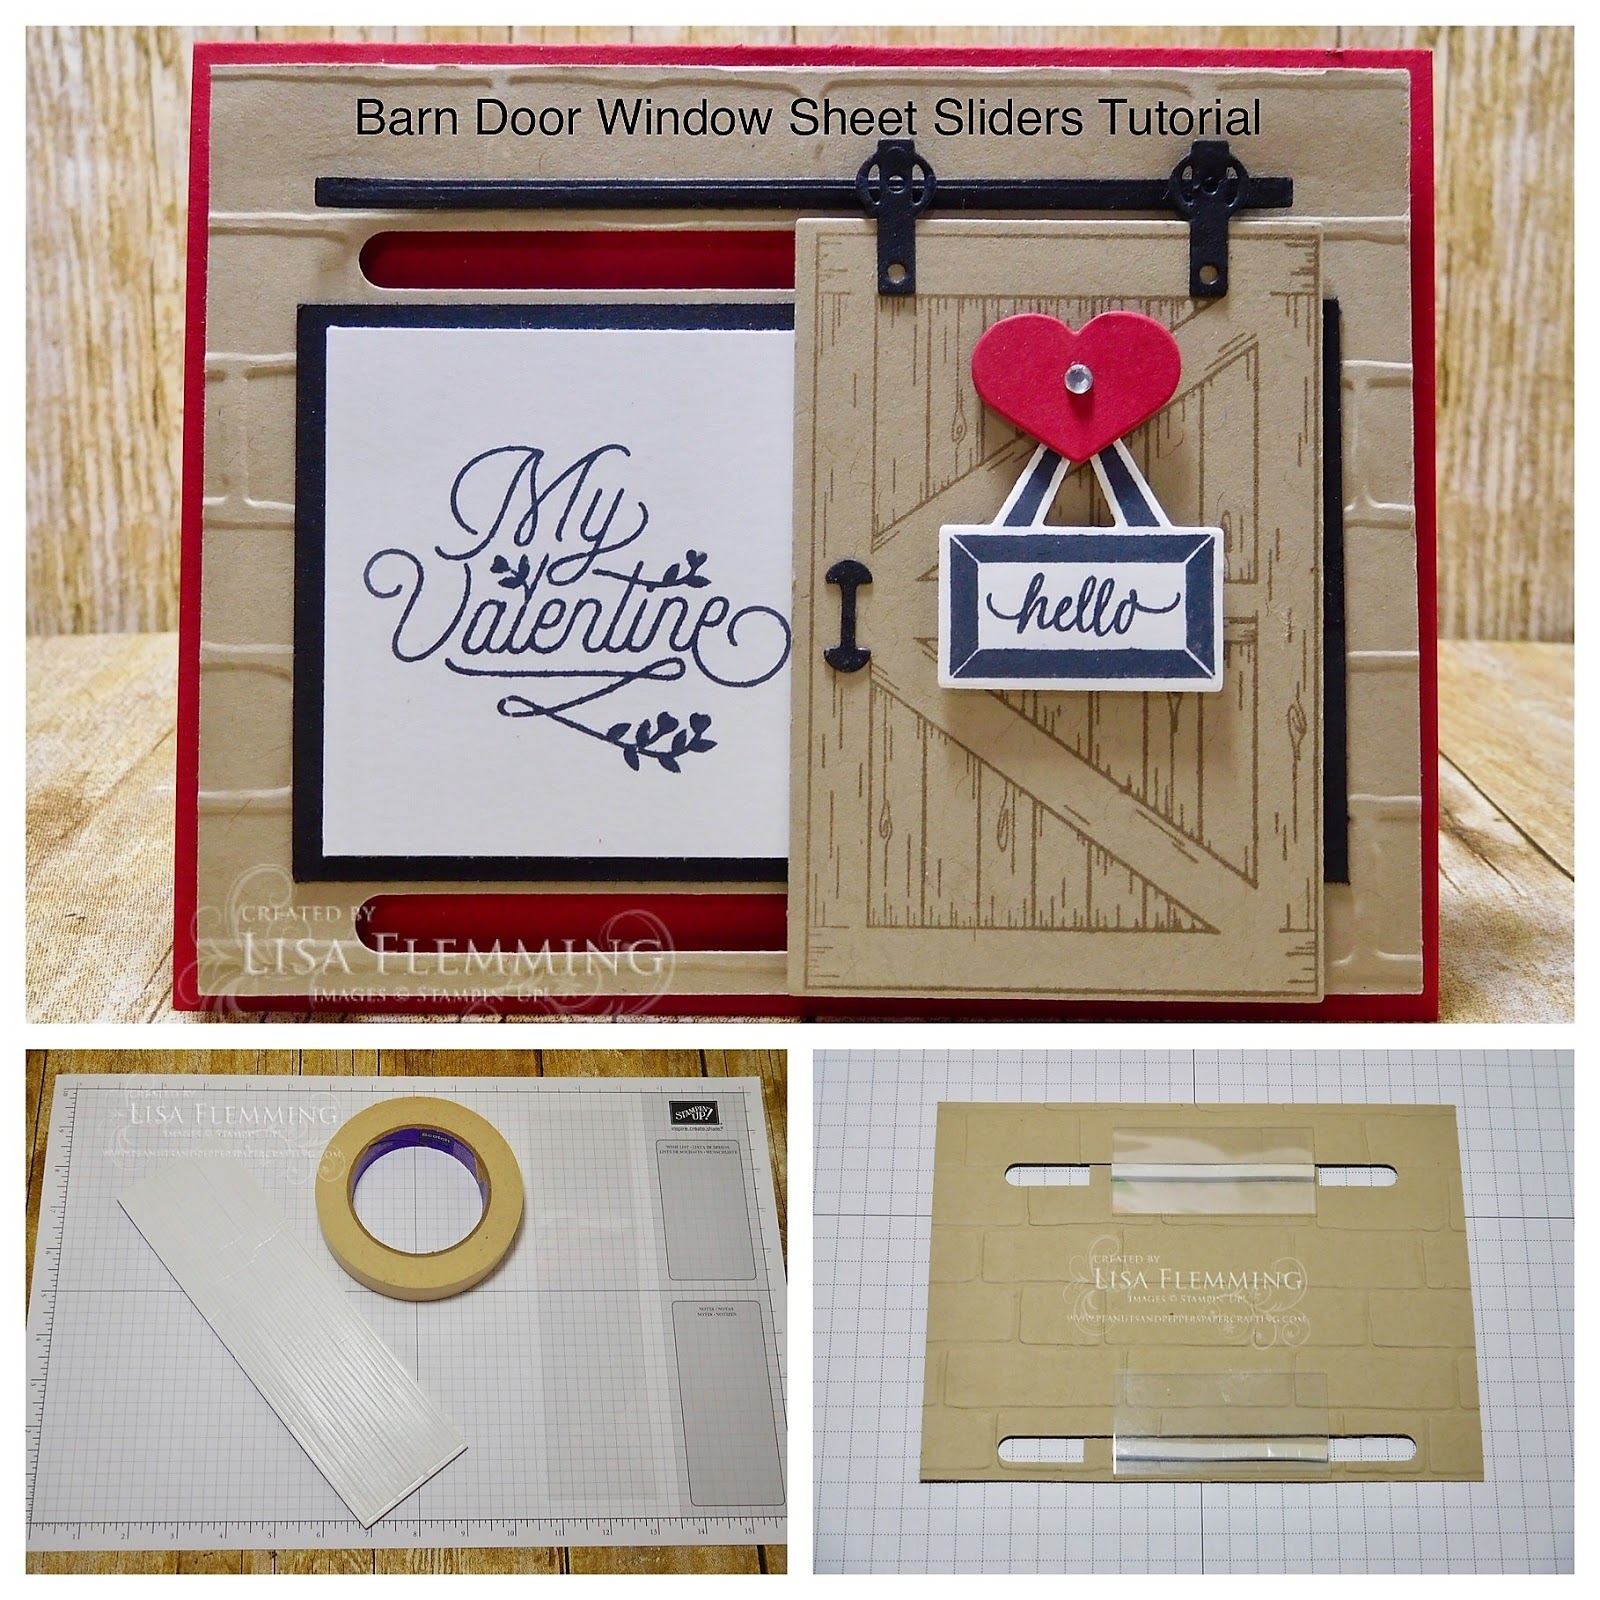
1. You will need Stampin' Up! Foam Adhesive Strips, Window Sheets, and Painter's Tape.

2. Move the Barn Door die cut to the end of the Sliding Door Framelits track.

3. Hold the Barn Door die cut down with a piece of Painter's Tape.

4. Cut 2 pieces of Window Sheets at 1" x 2", then cut the Foam Adhesive Strips into 2" pieces.

5. Turn the Sliding Door Framelits Track piece over on the back. Then insert 1 Foam Adhesive Strip as close to the top of the track without it touching the slides.

6. Pull off the paper backing and place 1 of the Window Sheets on top of the Foam Adhesive Strip.

7. Now insert 1 Foam Adhesive Strip as close to the bottom of the track without it touching the slides.

8. Pull off the paper backing and place the other Window Sheet on top of the Foam Adhesive Strip.

9. Carefully pull off the Painter's Tape and your Barn Door will Slide Easily.


10. Now add extra Foam Adhesive Strips to each corner and the middle of the Sliding Door Framelits Track.

11. Pull off the paper backing again and attach the Sliding Door Framelits Track to your Card Front.


No comments
Post a Comment
Thank you for your kind words!