Good Morning Everyone! My Try It Thursday share are these quick and easy Witch Hat Halloween Treats created with a few various Stampin' Up! Up! Paper Punches, and store bought Halloween Treat Bags. They are perfect for last minute favors, when you don't have a lot of supplies. I used the Stampin' Up! Black Glimmer Paper to form the top of the hat and the brim. Then, I embellished it with the Stampin' Up! Happy Haunting Designer Series Paper and Gift Bow Punch Bow. I love how these turned out! Look below to see the FREE Tutorial on creating the Witch Hats!
Paper: Black Glimmer Paper, Happy Haunting Designer Series Paper
Accessories: 2 1/2" Circle Punch, 1 3/4" Circle Punch, Tree Punch, Gift Bow Punch, Mini Clothespins, Mini Glue Dots, Tear and Tape, Halloween Treat Bags
Happy Stamping!
Mini Witch Hat Tutorial
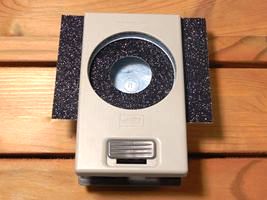
1. You will need the 2 1/2" Circle Punch, 1 1/4", Circle Punch, Tree Punch, Gift Bow Punch, Black Glimmer Paper, Happy Haunting Designer Series Paper, Mini Clothespins, Mini Glue Dots.
2. Use the 1 1/4" Circle Punch to punch a circle on a piece of Black Glimmer Paper.
3. Take the 2 1/2" Circle Punch and punch another circle around the 1 1/4" circle.
4. You circle should look like this.
5. Now take the Tree Punch and punch 2 trees from a piece of the Black Glimmer Paper.
6. Fold the circle in half and crease with a bone folder.
7. Use Tear and Tape to attach both tree pieces to each side of the mini clothespin.
8. The clothespin looks like this on the inside.
9. Put Mini Glue Dots on the bottom of both sides of the trees, and attach them to the folded circle.
10. Attach a Bow created with the Stampin' Up! Gift Bow Punch to front of the hat.
11. Clip the Witch Hat to the Halloween Treat Bag!


Cute! I love these witch hats and made several myself, thanks to Janet Baker who demonstrated these at one of the SU! conventions and for everyone who shared how to make them. So simple, and so cute!
ReplyDelete